Table of Contents
SD Quick Setup Guide
We get asked fairly often “what do I need to run SD and how much does it cost”. The full answer is pretty complicated because there are a number of different sensor options and input configurations available to you to choose from. This page doesn't cover all that. The purpose of this page is to give you a quick start guide to the “typical” setup with ECMLink.
If you want a FULL explanation of how to setup speed density with ECMLink, see our SD Setup Page.
Sensors and Cables
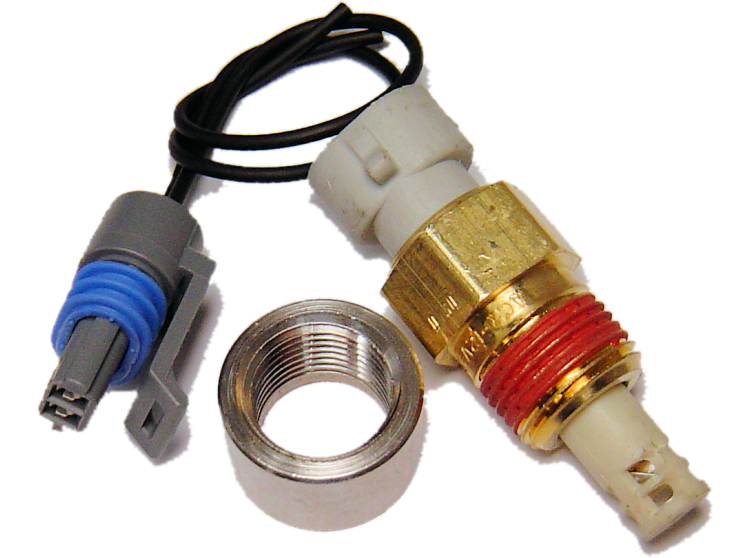
 The first thing you'll need are the MAP and IAT sensors. The most common choice is our Generic GM-style SD Bundle.
The typical MAP sensor install has it mounted on the firewall and then connected directly to a dedicated port on the intake manifold using a short (6-8 inches) piece of vacuum hose. Do not use a throttle body port for this!
The typical IAT sensor install involves welding a bung to the throttle body elbow. You'll need to indicate whether the material is aluminum or stainless steel when you order the SD Bundle.
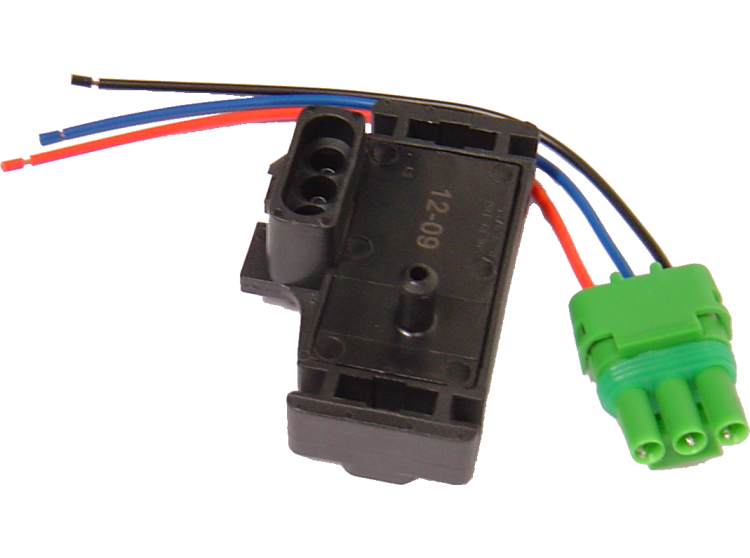
The easiest way to connect these sensors to the car's wiring harness is to use our plug-n-play SD cable. One end of this cable plugs into the car's existing MAF connector (specify either 1G DSM or 2G DSM for this) and the other end plugs directly into the IAT and MAP sensors above.
ECMLink Configuration
If you're using the SD Bundle above and our SD Cable, then configuration of ECMLink for SD operation is pretty simple.
You specify that you have an Omni 4-bar sensor connected to the Baro input in the ECU Inputs tab in the Pin Assignments for ECMLink Functions (ECU-side) section.
Then you go into the MAFComp tab and set the BaseMAF to “Speed Density”.
That's about it! A full explanation of how to setup speed density with ECMLink is on our SD Setup Page. Refer to that page for specifics of which screens to use, but the basics are pretty much what's described above.
Page Tools
